Azure Container Apps

Azure Container Apps (ACA) is a fully managed platform that enables you to run containerized applications leveraging the power of Kubernetes orchestration while abstracting away the complexities of cluster management, simplifying the deployment and management of containerized apps. In this article, I present the benefits of this service and how to deploy an application to ACA using GitHub Actions.
This service allows you to have serverless applications based on containers, and it can be used to deploy API endpoints, host background processing applications, handle even-driven processing and run microservices. Some benefits of ACA are:
- Automatic Scaling: provides the possibility to automatically scale your apps horizontally, based on traffic, ensuring that the apps will handle increased traffic without downtime or performance degradation, ensuring a smooth user experience.
- Powered by Kubernetes: offers a fully managed experience for deploying containerized applications without needing direct access to Kubernetes APIs or cluster management (ACA does not provide direct access to Kubernetes API, so in case you need to have access to it, consider using the Azure Kubernetes Service — AKS), making it easier and simpler to run containerized apps.
- Powered by open-source technologies like Dapr (a Distributed Application Runtime that helps to speed your productivity when building microservices), KEDA (a Kubernetes event-driven autoscaler), and Envoy (a traffic proxy), which allows you to make use of these useful tools in your ACA apps.
- Simplifies management: it abstracts away the complexity of infrastructure management, and provides a managed environment for deploying, scaling, and updating applications, reducing the operational overhead.
- Can run containers from any registry: public, private, Docker Hub and Azure container Registry (ACR).
- Integration with other Azure Services: ACA can integrate with services such as Azure Monitor (using Azure Log Analytics), Azure Logic Apps, Azure Functions and Azure Sprint apps, enabling developers to create robust and interconnected solutions.
- Deploy with CI/CD: it’s possible to deploy your container app using CI/CD pipelines (integrates with GitHub Actions and Azure DevOps Pipelines), allowing you to publish revisions (a revision is an immutable snapshot of a container app version) to your container app. When a commit is pushed to your repository, the pipeline is triggered and updates the container image in the container registry; Azure Container Apps creates a new revision based on the updated container image.
- HTTPS and TCP ingress: allows you to easily expose your containerized applications to various environments, including the public web, your virtual network (VNET), and other container apps within your environment. It achieves this by enabling ingress, without the requirement of creating additional Azure resources such as Azure Load Balancer, public IP addresses or any other Azure resources to enable incoming HTTP requests or TCP traffic.
- Securely manage secrets: can easily store and manage sensitive information, such as keys and other secrets, directly in your application, ensuring their availability to revisions of your container apps.
Creating a Azure Container App
To create a Container App, go to Azure Portal and search for Container Apps (you will also need a Container Instance, which can be previously created via Portal or can be created during the deployment of the app using Visual Studio):

Then click on “Create”:

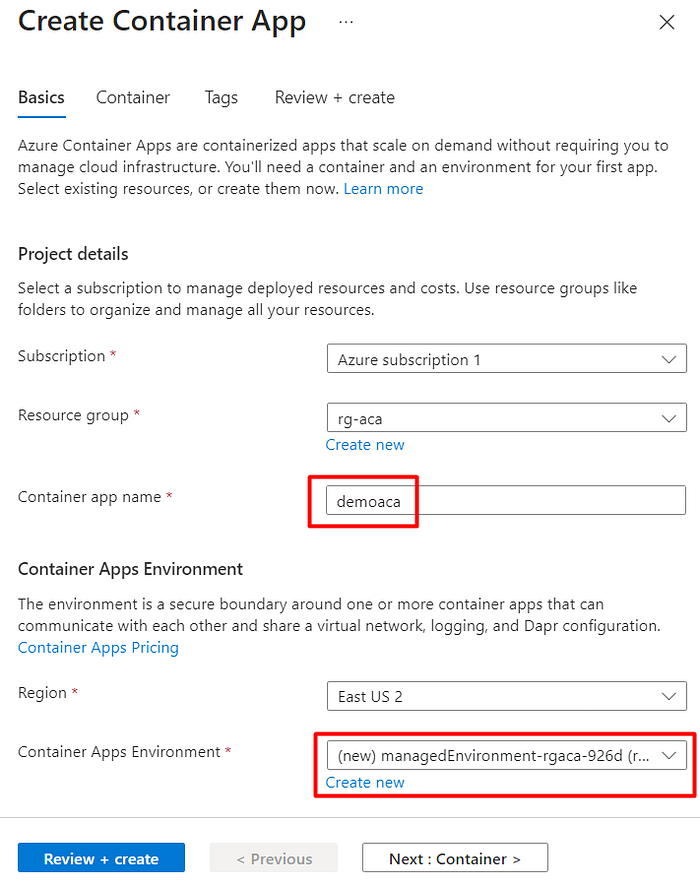
On the Basics creation page:
- Select the
Resource Groupfor your ACA, and add thenamefor your container app. - Select the environment for your app, or create a new one on
Container Apps environment, which is a secure boundary that can contain one or more containers and writes logs to a Log Analytics Workspace.
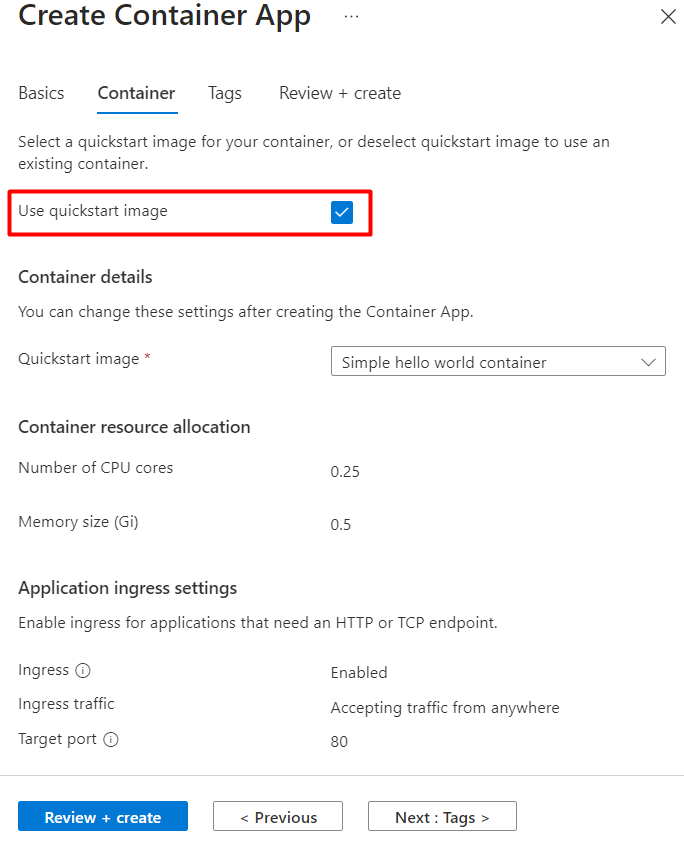
On the Container creation page:
- You can use a quickstart image or can use an existent image from Azure Container Registry, Docker Hub or other registries. For demonstration purposes, I’m going to use a quickstart image:
You can also create Tags for this ACA, which will allow you to categorize resources and view costs for the resource. For this demo, I’m not creating a tag, so click on “Review + create”, review the details and click on “Create”.
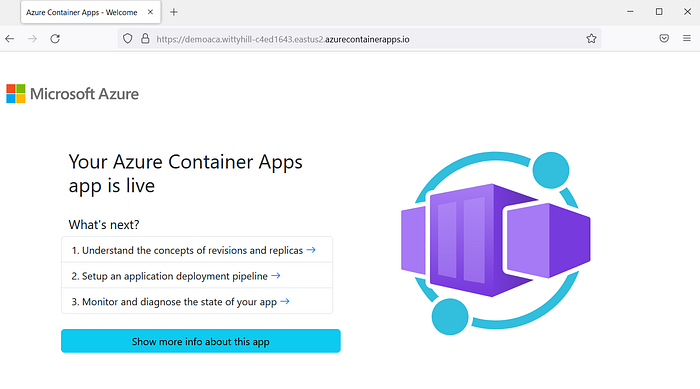
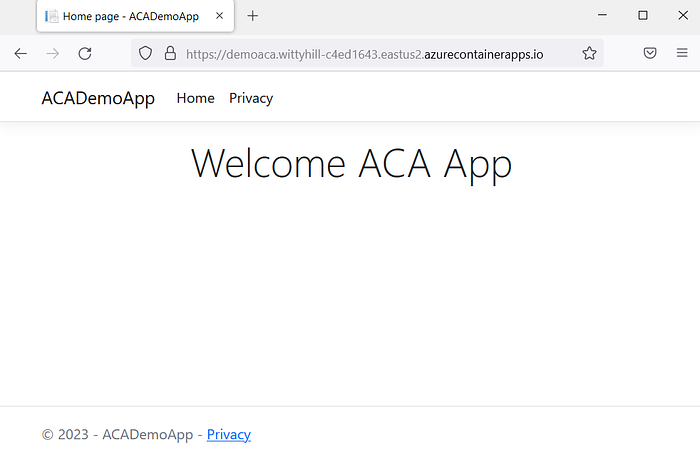
After the ACA is created, access the app on Azure Portal. On Application Url, get the URL and access it on another browser page:
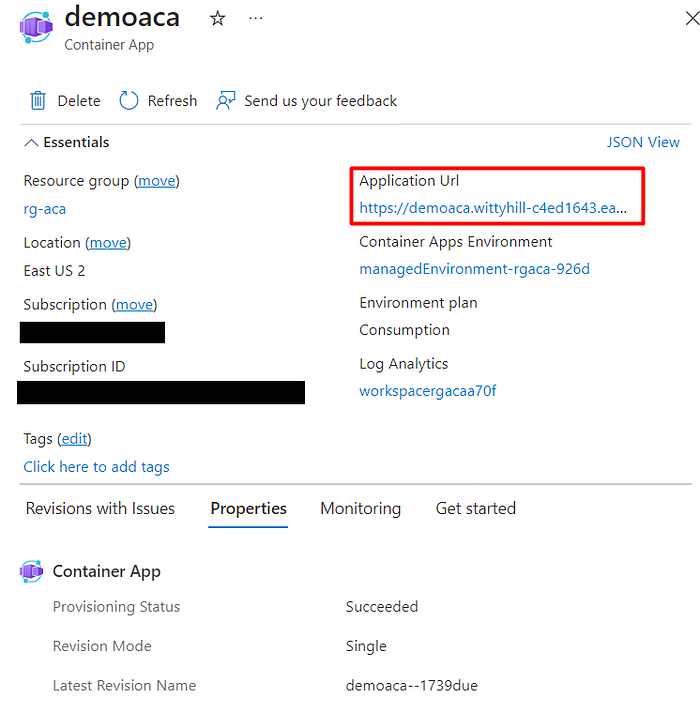
We can see that the app is running:
Here follows a brief summary of some important functionalities on the ACA page:
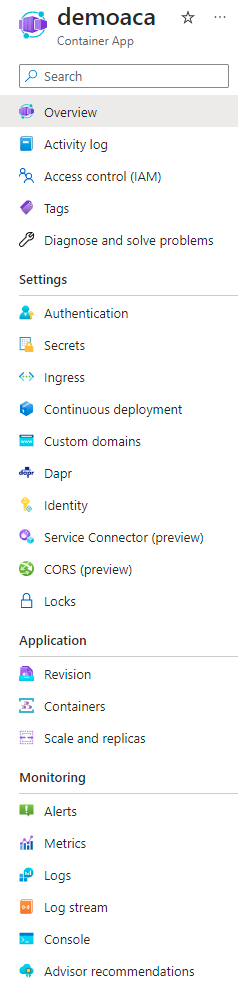
- On the
Overviewpage, you check the Application Url to access your app, and also see the graphs on the Monitoring tab, to see CPU, Memory and Network usage of your app. - On the
Settingssection, onIngresspage, you can configure the inbound traffic. - On the
Settingssection, on theContinuous deploymentpage, you can set continuous deployment to automatically build code and deploy it with GitHub Actions. - On the
Settingssection, you can also find configurations for yourSecrets,Custom domains,Dapr,CORS, and others. - On the
Applicationsection, on theRevisionpage, is where you can set a configuration to control which version of your container image will be exposed to inbound traffic, and how much percentual it will be. For example, you can set a configuration to expose version A of your app to X% of your users. - On the
Applicationsection, on theScale and replicaspage, you can find the settings for scaling and replicas. - On the
Monitoringsection, you can find a series of features related to monitoring features, such as alerts, metrics, logs, console and advisor recommendations.
Creating the app and deploying it with Visual Studio
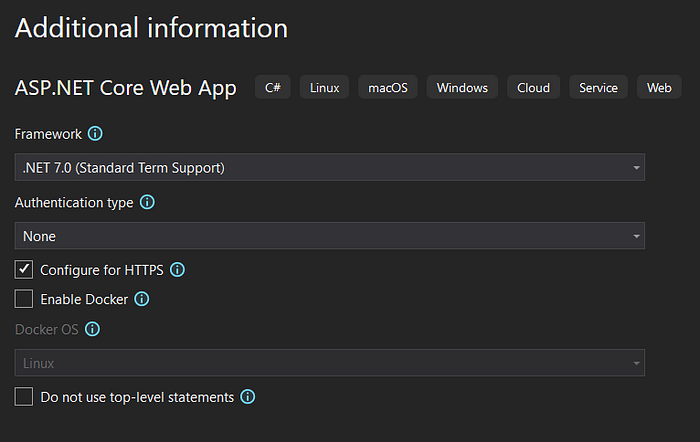
Let’s now create an ASP.NET Web Application that will be deployed to ACA using Visual Studio (it’s also possible to deploy the app using the Command Line or Visual Studio Code).
When creating the app, you can choose the option to use Docker or not, if you choose to use Docker, it will create a Dockerfile that will be used to build the container image that is run in ACA (then also make sure to select Linux for the Docker OS). If you choose to not use Docker, there will be no Dockerfile and it will use the .NET SDK to build the container image:
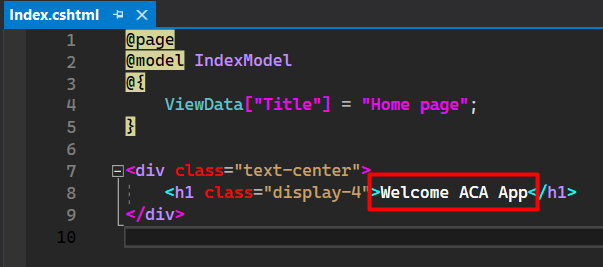
For this demo app, I only updated the text Index.cshtml page:
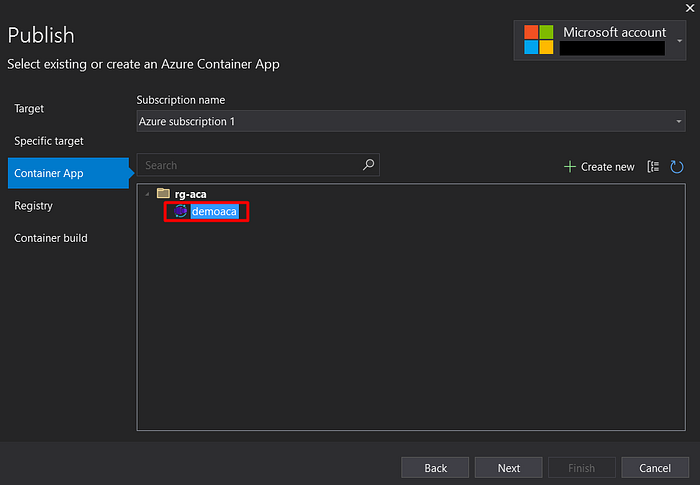
To Publish the app, go to the publish window in Visual Studio, and select the option “Azure Container Apps (Linux)”:

Select your ACA app:
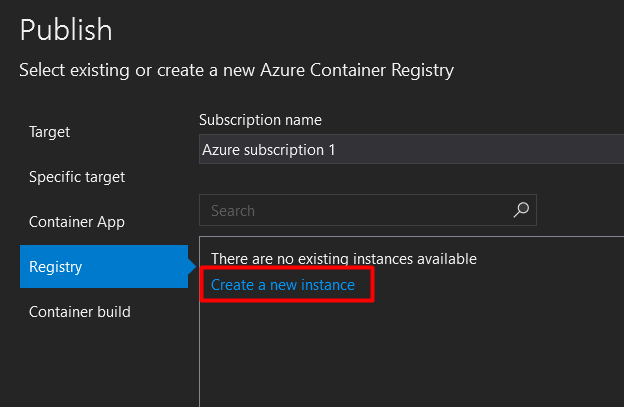
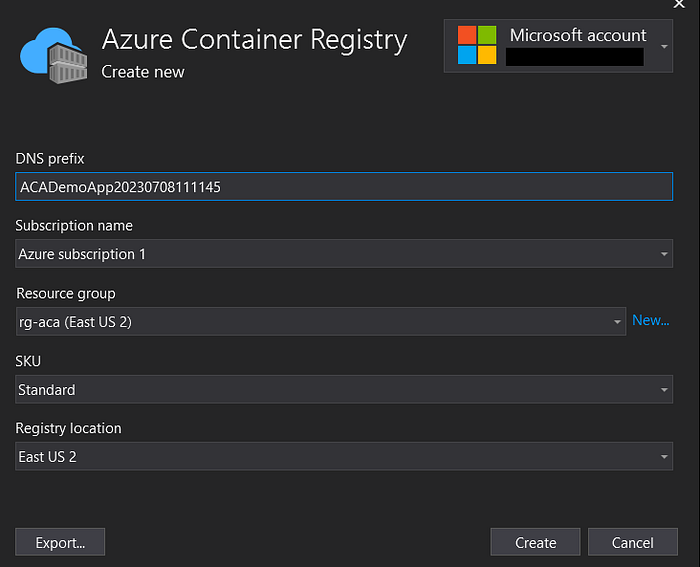
Then select an existent Azure Container Instance or create a new one:

Select the option “.NET SDK” (if you are not using Dockerfile) and click on “Finish”:

After that click on “Publish”:

If you get the error “Error Failed to retrieve information about ‘Microsoft.AspNetCore.App.Runtime.linux-x64’ from remote source”, try to clean and rebuild the app and publish it again.
Deploying the app can take some time, so don’t worry if the deployment seems slow. When finished the deploy, you will see the app running on ACA:
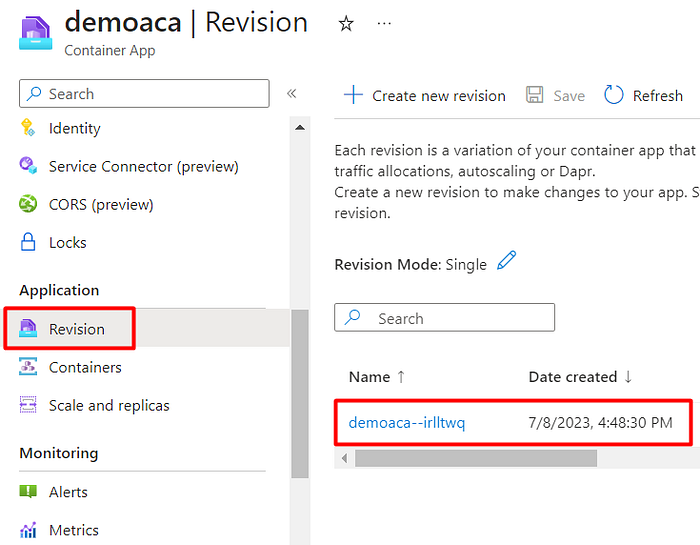
On the Revision page, you can see the information related to the revision of your container app:

Deploying a Container App using GitHub Actions
GitHub Actions is an automation tool provided by GitHub, which allows you to define custom workflows and automate various tasks directly within your GitHub repository. With GitHub Actions, you can set up Continuous Integration (CI), Continuous Delivery (CD), and other automated workflows to streamline your development processes.
In this topic, I’m going to present how to publish the app using CI/CD through GitHub actions. For that, create a repository for your project on GitHub, and commit your project.
On Visual Studio, create a new publish profile, and follow the same steps as mentioned previously. But now that you have opened a project that is hosted on GitHub, Visual Studio it will automatically detect this info and in the Publish window there will be the new step “Deployment type”, where you can select the option to use “CI/CD using GitHub actions workflows” (if you just added the project to GitHub, it will be necessary to restart VS to be able to see this new option):

Select this option and click on “Finish”. VS will then create a folder named .github in your project folder, with a YAML file inside this folder, which contains the GitHub Actions configuration to build and deploy the app to Azure every time you push the code.
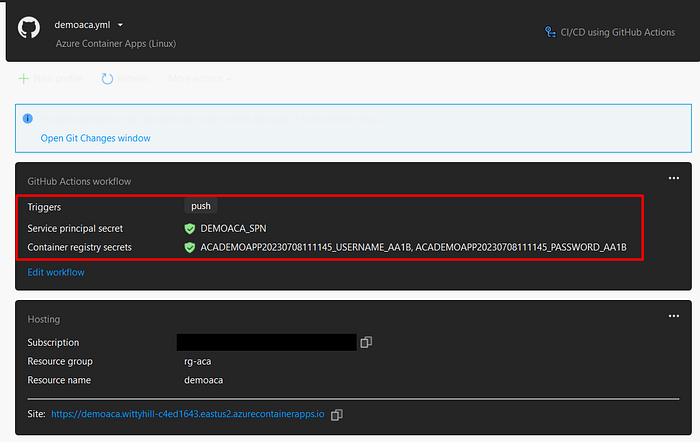
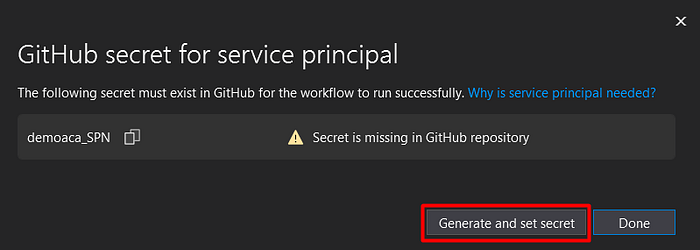
After that, confirm that all the secrets are settled on the GitHub Actions workflow section:
In case a secret is missing on GitHub, VS will display a message on this step, and there will be an option in VS which will allow you to generate the secret, for example:
The YAML file created by VS has the commands for building a .NET application, publishing a container image to a registry, and deploying the containerized application to Azure using GitHub Actions and Azure CLI.
Some configuration values such as usernames, passwords, and secrets, are represented as GitHub secrets and are not visible in the provided YAML. These values would be stored securely in the GitHub repository’s secret store.
Note that in the YAML file, VS will create the configuration to trigger the workflow on a push event to the main branch, so make sure that your branch in GitHub is the main branch, or update the YAML file using the branch name of your app:
name: Build and deploy .NET application to container app demoaca
on:
  push:
    branches:
    - main
on the YAML file you can also find the environment variables that are defined, including the names of the container app, container registry, resource group, and other related values used throughout the workflow:
env:
  CONTAINER_APP_CONTAINER_NAME: simple-hello-world-container
  CONTAINER_APP_NAME: demoaca
  CONTAINER_APP_RESOURCE_GROUP_NAME: rg-aca
  CONTAINER_REGISTRY_LOGIN_SERVER: xxxxxxxxxxx.azurecr.io
  DOTNET_CORE_VERSION: 7.0.x
  PROJECT_NAME_FOR_DOCKER: academoapp
The “build” job runs on an Ubuntu environment and includes steps to checkout the repository, set up the .NET SDK, log in to the container registry, build and push the container image, and upload a binlog artifact:
jobs:
  build:
    runs-on: ubuntu-latest
    steps:
    - name: Checkout to the branch
      uses: actions/checkout@v3
    - name: Setup .NET SDK
      uses: actions/setup-dotnet@v1.8.0
      with:
        include-prerelease: True
        dotnet-version: ${{ env.DOTNET_CORE_VERSION }}
    - name: Log in to container registry
      uses: azure/docker-login@v1
      with:
        login-server: ${{ env.CONTAINER_REGISTRY_LOGIN_SERVER }}
        username: ${{ secrets.ACADemoApp_USERNAME }}
        password: ${{ secrets.ACADemoApp_PASSWORD }}
    - name: Build and push container image to registry
      run: dotnet publish -c Release -r linux-x64 -p:PublishProfile=DefaultContainer -p:ContainerImageTag=${{ github.sha }} --no-self-contained -p:ContainerRegistry=${{ env.CONTAINER_REGISTRY_LOGIN_SERVER }} -bl
    - name: Upload binlog for investigation
      uses: actions/upload-artifact@v3
      with:
        if-no-files-found: error
        name: binlog
        path: msbuild.binlog
The “deploy” job runs on an Ubuntu environment and depends on the successful completion of the “build” job. It includes steps to log in to Azure, deploy the container app using Azure CLI, and finally, log out from Azure:
 deploy:
    runs-on: ubuntu-latest
    needs: build
    steps:
    - name: Azure Login
      uses: azure/login@v1
      with:
        creds: ${{ secrets.demoaca_SPN }}
    - name: Deploy to containerapp
      uses: azure/CLI@v1
      with:
        inlineScript: >
          az config set extension.use_dynamic_install=yes_without_prompt

          az containerapp registry set --name ${{ env.CONTAINER_APP_NAME }} --resource-group ${{ env.CONTAINER_APP_RESOURCE_GROUP_NAME }} --server ${{ env.CONTAINER_REGISTRY_LOGIN_SERVER }} --username ${{ secrets.ACADemoApp20230708111145_USERNAME_AA1B }} --password ${{ secrets.ACADemoApp20230708111145_PASSWORD_AA1B }}

          az containerapp update --name ${{ env.CONTAINER_APP_NAME }} --container-name ${{ env.CONTAINER_APP_CONTAINER_NAME }} --resource-group ${{ env.CONTAINER_APP_RESOURCE_GROUP_NAME }} --image ${{ env.CONTAINER_REGISTRY_LOGIN_SERVER }}/${{ env.PROJECT_NAME_FOR_DOCKER }}:${{ github.sha }}
    - name: logout
      run: >
        az logout
After pushing the changes, the secrets will be added to the
Secrets and variablespage on your GitHub repository.
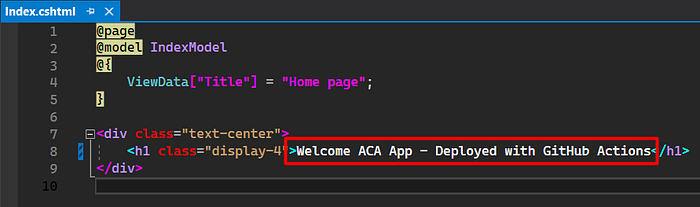
Before pushing the changes, let’s make one change in the Index.cshtml file, to make it easier to visualize the update in the ACA app:
Now commit and push the changes to your GitHub repository and on your repository page go to Actions, and you will see the workflow:

Click on the workflow and you will see the build and deploy progress:
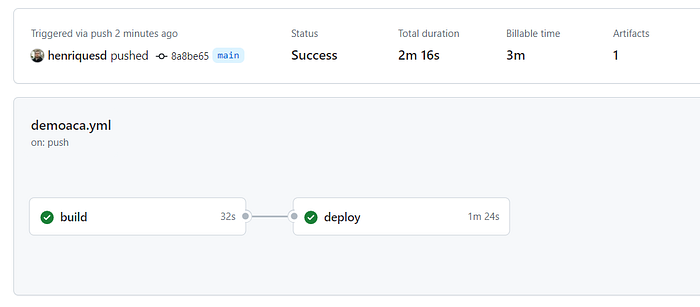
If you click on some of these steps you will be able to see more details about the build and deploy jobs:

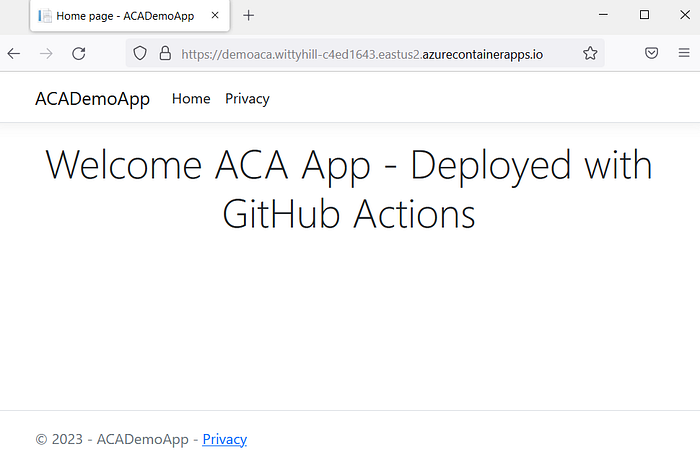
And now accessing the URL of your container app you will see that the new version was automatically deployed:
On the ACA page, on the Revision page you can see the new revision of your container app:
Conclusion
Azure Container Apps gives you the benefits of running containerized applications with the power of Kubernetes orchestration while abstracting away the concerns of managing cloud infrastructure and complex container orchestrators. This service can be a great choice when you need to run containerized applications and fits really well with microservices architecture. The deployment of your container app can be integrated with GitHub Actions, allowing you to set Continuous Integration and Continuous Delivery processes to deploy your app.
References
Microsoft Azure — Azure Container Apps
Microsoft Docs — Azure Container Apps overview
Microsoft Reactor — Serverless microservices with Azure Container Apps
Microsoft Docs — Deploy to Azure Container Apps from Azure Pipelines
Microsoft Docs — Revisions in Azure Container Apps
Microsoft Docs — Comparing Container Apps with other Azure container options
Microsoft Docs — Tutorial: Deploy to Azure Container Apps using Visual Studio
Microsoft Azure — How to get started with Azure Container Apps