Azure Service Bus

Azure Service Bus is a fully managed enterprise message broker with message queues and publish-subscribe topics (in a namespace — a container for queues and topics), and it is used to decouple applications and services from each other, allowing the use of message exchange with asynchronous communication. In this article, I present the benefits of using Azure Service Bus, the differences between Queues and Topics and how to make use of Service Bus Client in a .NET application to send and receive messages from queues and topics.
Azure Service Bus

Azure Service Bus provides a secure and reliable way to send and receive messages between various applications, services, and devices, by using AMQP — Advanced Message Queuing Protocol — protocol (other message systems such as RabitMQ, Apache Qpid, IBM MQ, ActiveMQ, also use this same protocol).
A message contains data that is sent by an application and will be consumed by another app. A message is composed of two main parts:
- The message
body: on which contains the data that is being transmitted - The message
properties: which provides metadata about the message, in the form of key-value pair properties. These are some common message properties: Message Id, Correlation Id, Label, Time to Live (TTL), Delivery Count, Reply To, Session Id.
The exchange of messages between applications that use the Service Bus can be done using two different structures: Queues and Topics.

Queues
Queues are a data structure that stores messages that are sent between two or more applications/services. A message is stored in a queue until they are retrieved by a receiver. A queue is basically the implementation of the data structure FIFO (First-In-First-Out), which means that the first message that arrives in the queue, will be the first message that will be processed, that is, messages are delivered and processed in the order that they are received, ensuring that messages are handled in the order that they are sent. In a queue-based messaging system, it is common to have one or more producers that send messages to the queue, and a single consumer that receives and processes the messages.

Note that the maximum queue size is 80 GB (if your queue size is expected to grow more than that, you can consider Queue storage, but take into account the other differences between these two services before making any decision).
Topics
Topics are a data structure that allows you to publish messages that will be received (subscribed) by multiple receivers (each receiver has its own subscription — not “Azure Subscription”). It is similar to a queue, but it allows multiple subscribers to receive copies of the same message. When a message is published/sent to a topic, it is delivered to all the subscribers of that topic (each subscriber will receive a copy of the message and can process it independently).
Note that even after all the subscribers receive the message, it will not be automatically deleted from the topic. The subscribers must explicitly delete the message after it has been processed or it will remain in the topic and could be delivered to the subscribers again.
It’s possible to create rules on a subscription. You can have a filter to define a condition for the message to be copied into the subscription in case you don’t want a subscription to receive all messages sent to a topic, and you can also have an optional action that can modify message metadata, in case you want to mark up messages with extra metadata when they pass through a subscription.
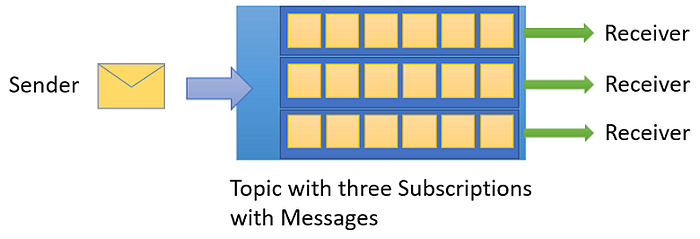
In summary, queues are useful when you want to deliver a message to a single receiver, while topics are useful when you want to deliver a message to multiple receivers.
Topic Filters
It’s possible to create filters, for the Subscribers to define which messages they want to receive from a topic. These messages are specified in the form of one or more named subscription rules. Each rule consists of a filter condition that selects particular messages, and optionally contains an action that annotates the selected message. Service Bus support three filter conditions:
- SQL filters: this kind of filter allows you to filter messages based on a SQL-like syntax/conditional expression.
- Boolean filters: the TrueFilter and FalseFilter allow all arriving messages (true) or none of the arriving messages (false) are selected for the subscription.
- Correlation filters: this kind of filter allows you to filter messages that matched against some properties, such as CorrelationId, ContentType, Label, MessageId, ReplyTo, ReplyToSessionId, SessionId, To and any user-defined properties.
Common Usage
Two common scenarios to use a Message-Oriented system, such as Azure Service bus, are:
- Microservices and Distributed systems: scenarios where you need to enable asynchronous communication between applications/services (this way you can decouple the sender from the receiver, allowing them to operate independently).
- Long-term processing: scenarios where your application needs to process something that will take too much time, for example, if your app needs to process a file that will result in some delay in your app, you can make use of a message system in order to inform the user that the file is being processed and he will receive a notification once the process finishes, preventing the user from having to wait for the processing to finish until he can use the application again.
[Extra] Azure Service Bus Sessions
This topic is out of the scope of this article, but I believe it’s important to present an introduction about Service Bus Sessions.
Sessions are a feature that can be enabled on queues and topics, that allow you to group a set of related messages together and process them as a single unit. When enabling sessions on a queue or topic, each message is associated with a session identifier, which you can use to group the messages together and process them.
If you want to use Sessions with Azure Service Bus, you can create a queue or a topic with sessions enabled, and then create a message consumer that can handle session-aware messages. When you send a message to a session-enabled queue or topic, you can specify the session identifier for the message, which will determine which session the message belongs to. When the consumer receives the message, it can use the session identifier to identify the session and process the messages in the session as a unit.
This feature can be useful in the following situations:
- When you need to process a group of related messages in a specific order
- When you need to hold a lock on a group of messages while processing them, to prevent other consumers from processing the same messages concurrently
- When you need to store state information about a group of messages, such as the progress of a batch-processing job
Example of how Session works and which problem it solves
Let me give some extra explanation about the problem that sessions can solve and how it works. Think of a scenario where you receive messages in a queue, and you need to process these messages in the sequence that they were sent. So let’s say you received messages 1, 2 and 3, and the messages will be processed as First-in-First-out (FIFO), which is fine.
But now let’s say that you have multiple pods of your application, and the first message was received and is being processed, but your app calls some store procedure (just an example) that takes 3 seconds to be executed, and in this meantime, the second message was also received by another pod of your application, and your app will also call a store procedure but one that will take only 1 second to be executed. In this case, the second message will be processed before the process of the first message is finished, which is something you don’t want. In order to solve this problem, you can use Sessions.
With Sessions, you can add for example, these three messages into a group, let’s say group 1. And your app will get the first message, it will process it, and only after finishing this processing, it will get the second message. And let’s say that now there is a new message number 4, which is in section number 2. So we have messages 1, 2 and 3 in session 1, and message 4 in session 2. What happens is that your app will receive the message number 1 from session 1, and while executing it, another pod of your app can receive the message number 4 from session 2, and process it.
The illustration below from Microsoft presents an illustration of what I just explained:
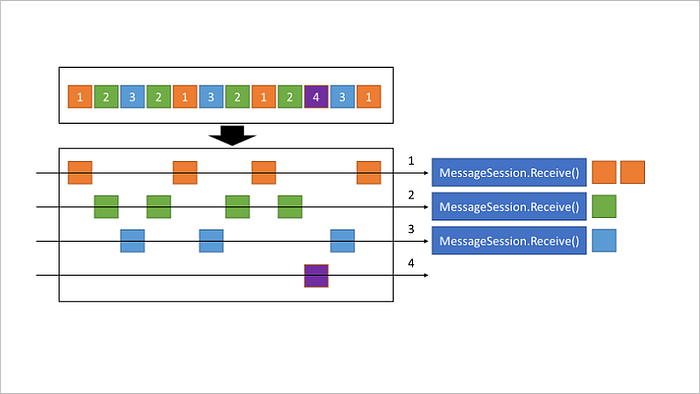
In this image, there are many messages, and the messages were grouped into sessions (sessions 1, 2, 3 and 4). This way even if multiple messages arrive, messages on each session will be processed following the FIFO pattern, so for session 1 it will be processed the messages 1, 2, 3 and 4 (in this sequence), and in session 2 messages 1, 2, 3 and 4 (in this sequence), etc. Note that sessions do not depend on each other, sessions are processed in parallel.
Creating an Azure Service Bus in Azure Portal
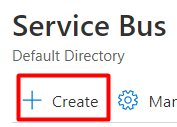
In Azure Portal, search for Service Bus:
Click on Create:
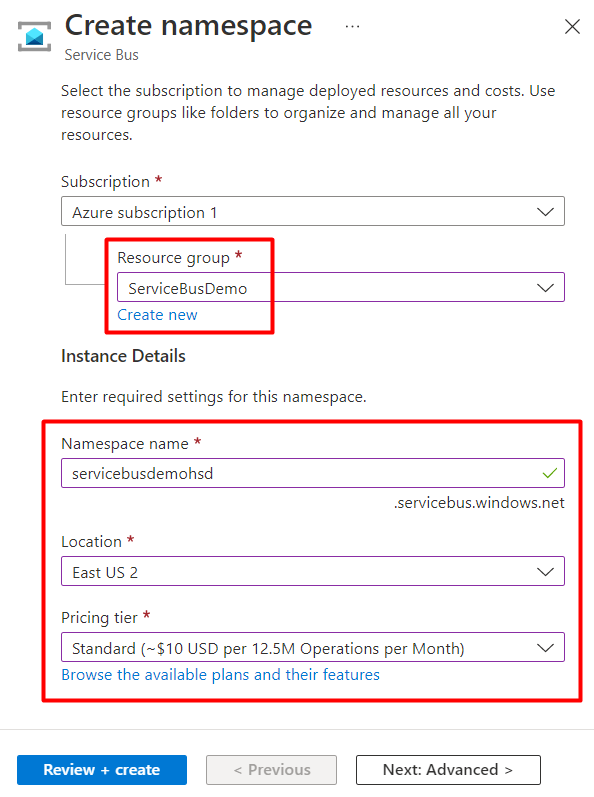
We need to first create a “Namespace”, which is a container for messaging entities such as queues, topics and subscriptions. A Namespace provides features such as authentication and authorization, message routing, and message tracking. You can use it also to manage different messaging workloads independently and it provides a way to isolate and manage messaging entities at a granular level.
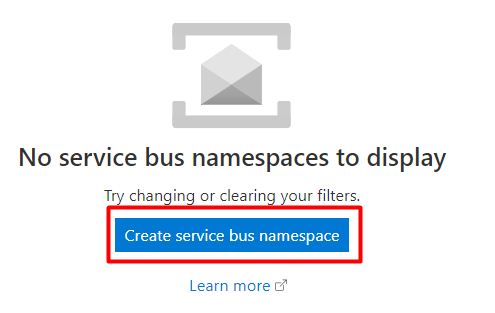
Click on “Create service bus namespace”:
Select the Resource group, add a Namespace name, select the Location and the Pricing tier and click on “Review + Created” and then “Create”:
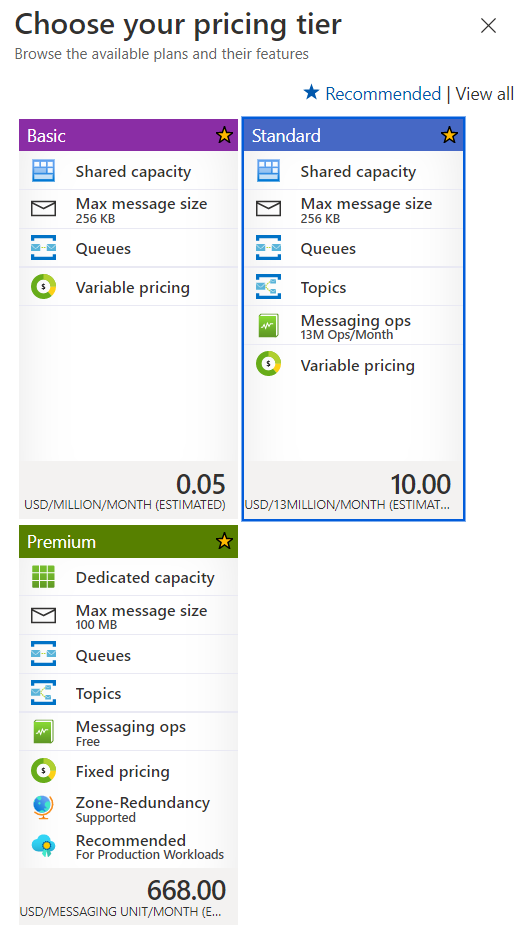
If you click on “Browse the available plans and their features”, you can see the pricing tier and what feature each plan offers. Since I’m going to use Queue and Topics for the examples in this article, I selected the “Standard” option:
Creating a Service Bus Queue
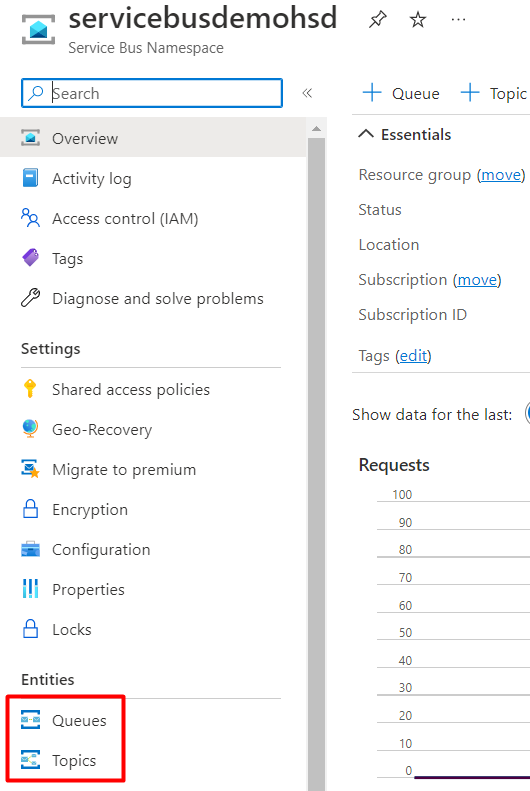
On the Service Bus page, you can see the options for Queues and Topics:
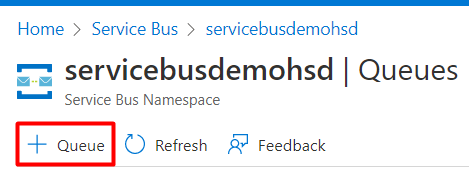
Click on “Queues” to add a new queue, and click on “+ Queue”:
In the next step, you need to inform a queue name, and you can configure the queue options and click on “Create” (for this demo, I kept the default configuration):

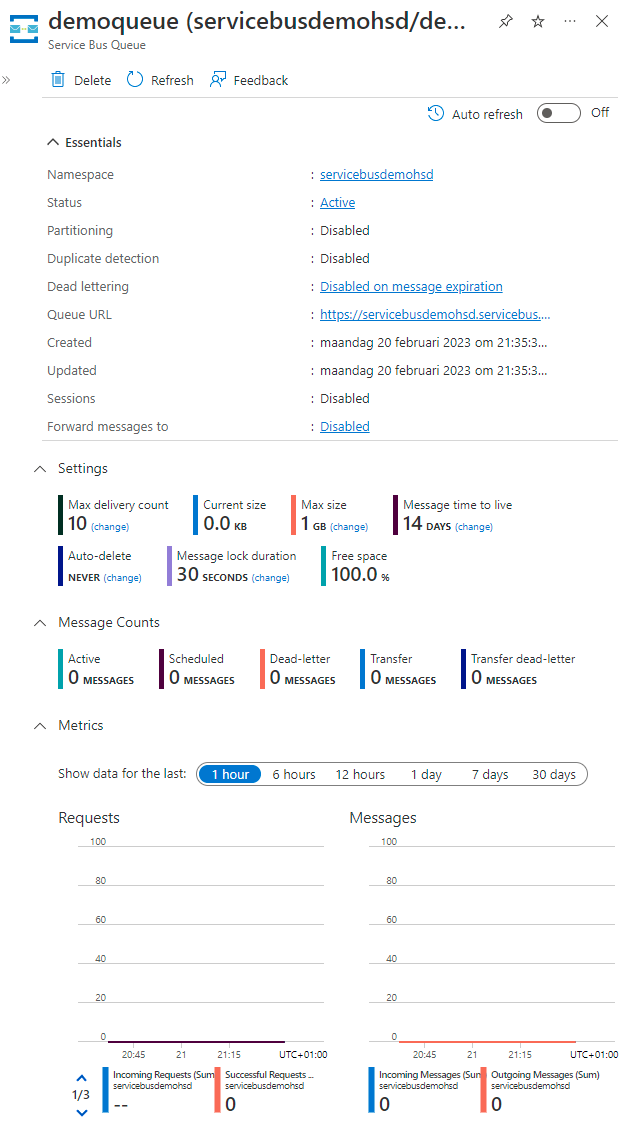
Now on the Queue page, you can see information about your queue:
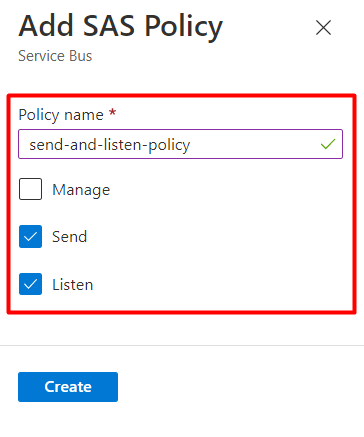
We also need to create a “Shared access policies” (SAS), with that you can set policies for Manage, Send and Listen to queue messages. On the Queue page, go to “Shared access policies” and add a new policy:

For demonstration purposes, I’m creating a single policy for “Send” and “Listen”, but in a production environment, it’s better to have separated policies: one for “Send”, and one for “Listen”:
Attention: Do that from the queue page, and not from the namespace page, otherwise you will apply the policy to all related queues and topics on the namespace.
Now if you click on the policy, you can get see the Keys and Connection Strings:
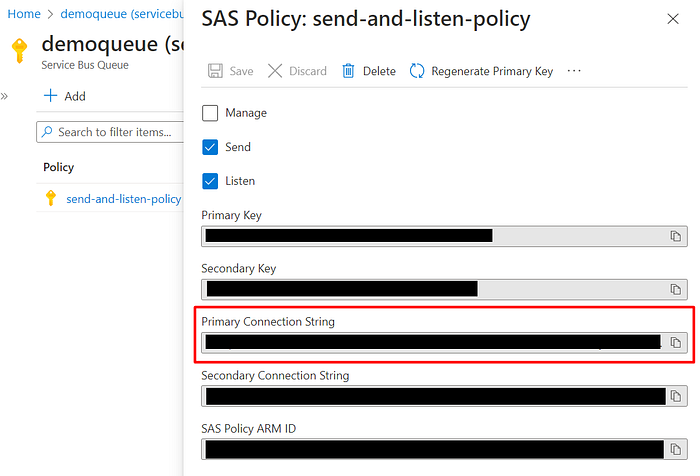
Copy and save the Connection String, we will need this to use in the .NET application. The Connection String has the following structure:
Endpoint=<sb-endpoint-value>;SharedAccessKeyName=send-and-listen-policy;SharedAccessKey=<shared-access-key>;EntityPath=<queue-name>;
In order to work with the Service Bus Client, you need to remove this part: ;EntityPath=demoqueue.
Sending and Receiving Messages from an Azure Service Bus Queue in a .NET Application
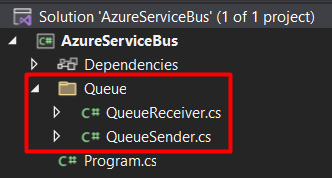
For send and receive messages, I created a Console Application with Visual Studio, using .NET 6:

And I created two classes, one to send messages to the queue, and another one to receive messages from the queue:
Right-click on the solution > Manage NuGet Packages for Solution:
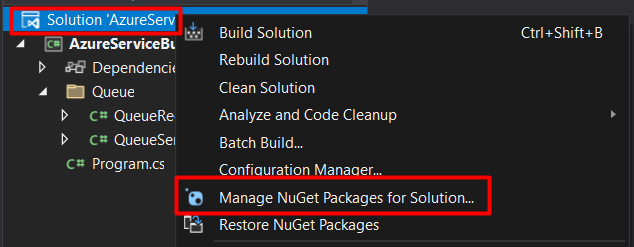
And install the following NuGet Packages:
Microsoft.Messaging.ServiceBus
Note: Azure.Identity package can be used when you want to authenticate with your Visual Studio account, instead of providing an access key. For this demo, I’m using the connection string.
Or install it via cmd:
Install-Package Azure.Messaging.ServiceBusNote: Azure.Identity package can be used when you want to authenticate with your Visual Studio account, instead of providing an access key. For this demo, I’m using the connection string.
For sending and receiving messages from a queue, I created two classes: QueueSender and QueueReceiver:

The code below is the code of the QueueSender class. It contains three private properties:
- On line 7, there is a variable for the namespace connection string.
- On line 8, there is a variable for the name of the queue.
- On line 10, there is a variable for the number of messages we would like to send.
Please note that for the connection string and queue name, it’s better to have it configured in a configuration file, and store the sensitive data in a secure place like KeyVault, etc.
Now add the SendMessages method, which will send a batch of messages at once:
- On line 8, we create a
ServiceBusClient, using the namespace connection string and client options. - On line 10, we create a
ServiceBusSender. - On lines 14 up to 21, we add the messages into the
messageBatch, with the “Try”, and this is because we need to make sure the size of the batch with the new messages is not too large, if so, it will throw an exception. - On line 25 we sent the batch of messages to the Service Bus queue, using the
SendMessagesAsync.
Let’s also add the SendMessagesOneByOne method, for demonstration purposes. This method will send messages one by one:
- The code above is a bit similar to the previous code, but on this one, on line 16, a single message will be sent.
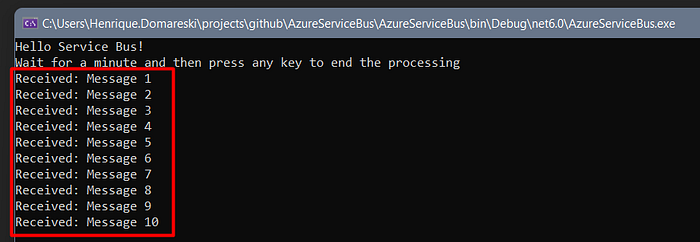
And in the Program.cs file we can call the SendMessages method:
await QueueSender.SendMessages();Now run the application and you should see the following message:

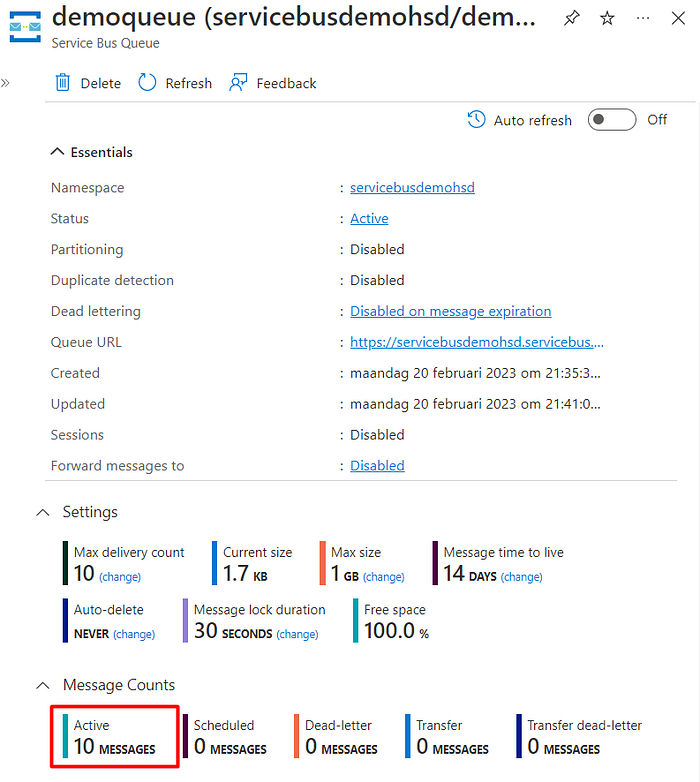
In Azure Portal, on the queue page, you should see the 10 Active Messages that were just sent:
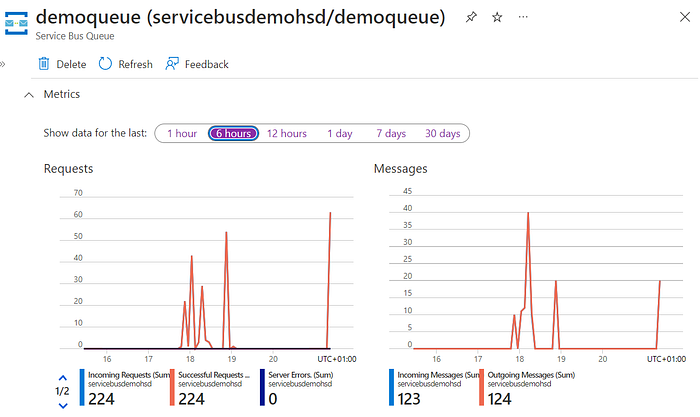
Note that you can also make use of Monitor features, and see requests and messages in the charts available on the Service Bus page.
Now let’s implement the class to receive the messages from the queue, the QueueReceiver class:
This class also contains the variables for the namespace connection string and the queue name.
Now add a method to ReceiveMessages, which will process the messages from the queue:
- On line 8, it creates a ServiceBusClient.
- On line 10, it creates a ServiceBusProcessor.
- On line 20, it starts processing the messages.
- On line 26, it stops processing the messages.
Let’s add now the two private methods for handling received messages and handling any errors when receiving messages:
- The first method is the private method that specifies handlers for the ProcessMessageAsync, to handle the received messages
- The second method is the private method that specifies the handler for the ProcessErrorAsync, to handle any errors when receiving messages
And in the Program.cs file we can call the ReceiveMessages method:
await QueueReceiver.ReceiveMessages();And now run the Receiver:
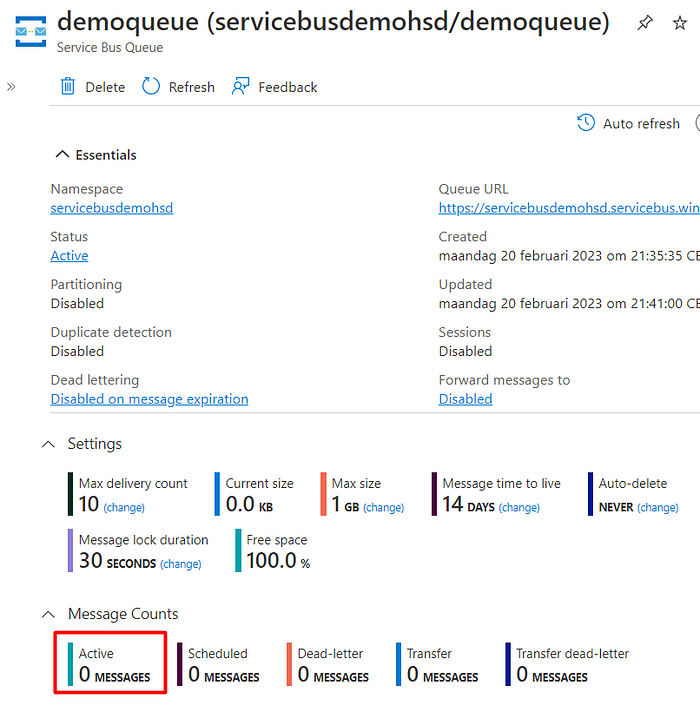
And back to Azure Portal, there will be 0 Active messages:
Creating a Service Bus Topic
On Azure Portal, on the Service Bus page, select the option to create “Topics”:

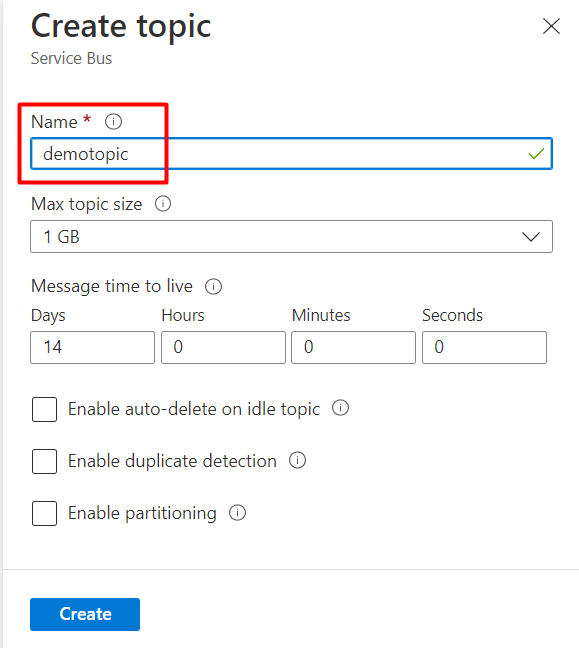
In the next step, you need to inform a name for the Topic, and you can configure the queue options and click on “Create” (for this demo, I kept the default configuration):
Important: Different from a Queue, where you have a publisher who add messages to the queue and a consumer that get the message from the queue, with Topic you can have multiple subscribers, and when a message is sent to a topic, if you have multiple subscribers for that topic, each of these subscribers will get the message from the topic.
On the Topic page, let’s create a new Subscription:

In the next step, you need to inform a name for the subscription and inform a Max delivery count (this means that for every delivery of a message, the delivery will be tried for maximum X times, and if it is not delivered after X attempts, it will be a fail delivery), and you can configure the other subscription options and click on “Create” (for this demo, I kept the default configuration):

And you will see the subscription on the Topic page:

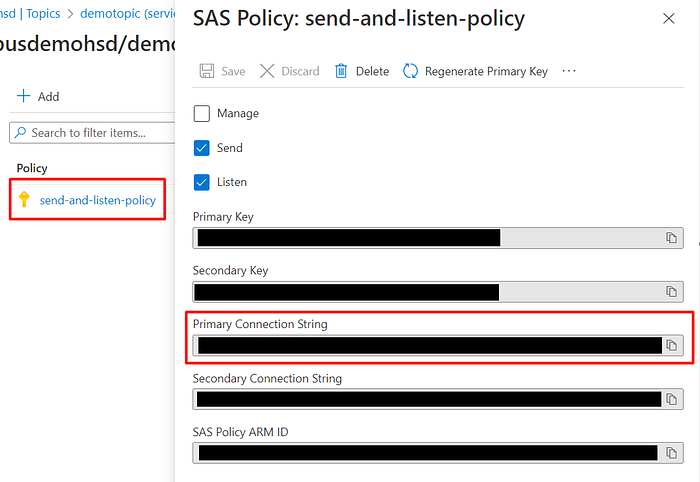
On the Topic page, create a “Shared access policies” (SAS) — as in the previous topic, for demonstration purposes I’m creating a single policy to Send and Listen, but for production environment, it’s better to have separated policies for that:

Then click on the created policy and get the Connection String, we will need it in the .NET app:
The Connection String has the following structure:
Endpoint=<sb-endpoint-value>;SharedAccessKeyName=send-and-listen-policy;SharedAccessKey=<shared-access-key>;EntityPath=<topic-name>;
In order to work with the Service Bus Client, you also need to remove this part: ;EntityPath=demoqueue.
Sending and Receiving Messages from an Azure Service Bus Topic in a .NET Application
For sending and receiving messages from a Service Bus Topic, I’m going to use the same application I created for sending and receiving messages from a Queue. This is a console application, built in .NET 6, and uses the package Azure.Messaging.ServiceBus. You can install this package via NuGet package manager or via the command line.
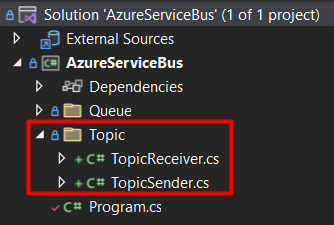
For sending and receiving messages from a queue, I created two classes: TopicSender and TopicReceiver:
The code below is the TopicSender class, which contains the variables for the namespace connection string, topic name and the number of messages to be sent:
Now add a method to SendMessages, which will send messages to the topic:
- On line 3, it creates a ServiceBusClient, using the connection string to the namespace.
- On line 5, it creates a ServiceBusSender, for the specific topic name.
- On line 7, it creates the ServiceBusMessageBatch object.
- On line 11, it adds the messages to messageBatch.
- On line 20, it sends the messages.
And in the Program.cs file we can call the SendMessages method:
await TopicSender.SendMessages();Now run the application and you should see the following message:
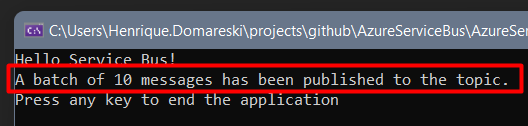
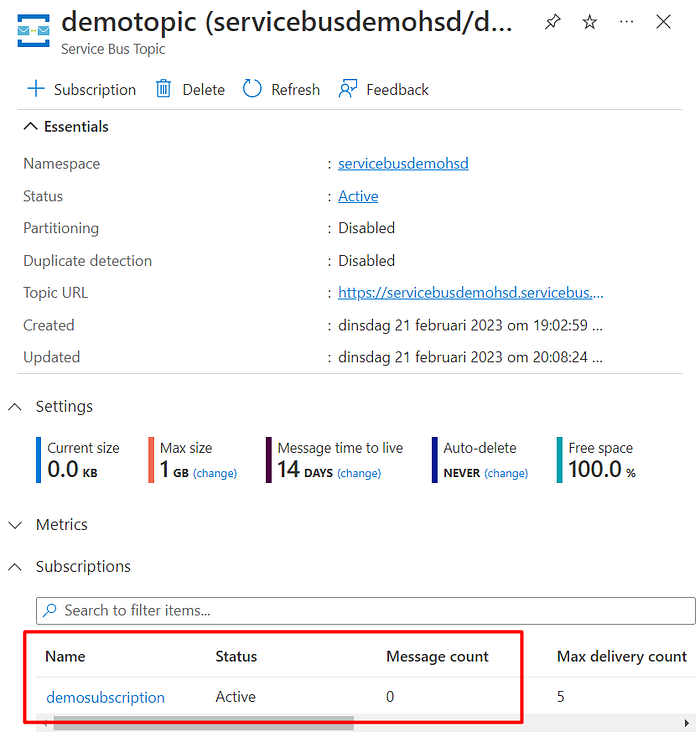
In Azure Portal, on the Topic page, you should see that there are 10 Active Messages:
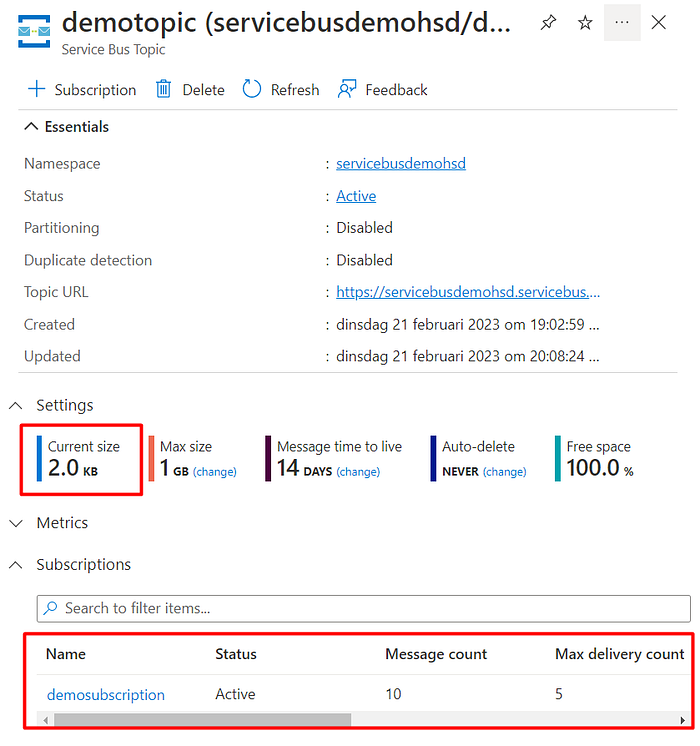
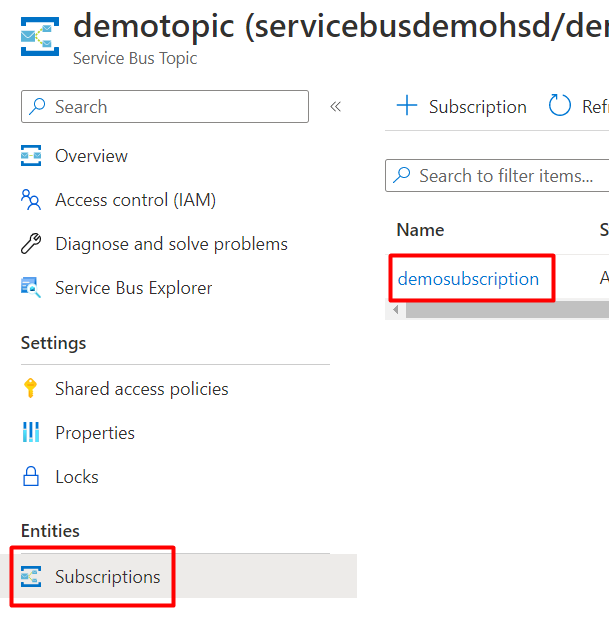
And from the Topic page, you can also go to the Subscriptions page:
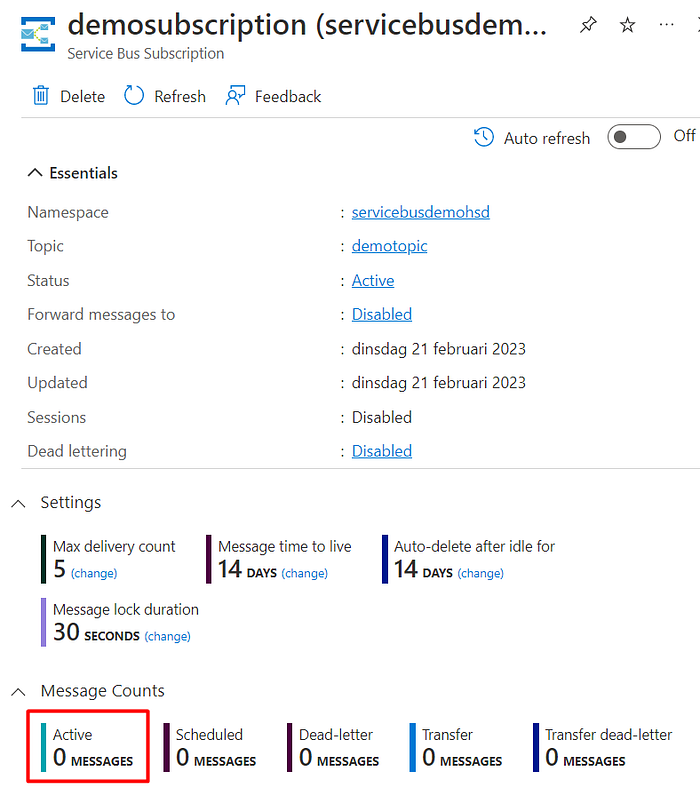
Select the subscription and you can also see the Active messages:

Now le’ts create the TopicReceiver class, which will be responsible for reading the messages from the Topic:
This class contains the variables for the namespace connection string, the topic name and the subscription name.
Now add a method to ReceiveMessages, which will process the messages from the Topic:
- On line 3, it creates a ServiceBusClient with the connection string to the namespace.
- On line 4, it creates a ServiceBusProcessor for the specific topic.
- On line 15, it starts to process the messages.
- On line 21, it ends the processing of the messages.
Let’s add now the two private methods for handling received messages and handling any errors when receiving messages:
- The first method is the private method that specifies handlers for the ProcessMessageAsync, to handle the received messages
- The second method is the private method that specifies the handler for the ProcessErrorAsync, to handle any errors when receiving messages
- On lines 14 up to 21, it specifies the handler for the ProcessMessageAsync.
And in the Program.cs file we can call the ReceiveMessages method:
await TopicSender.ReceiveMessages();Now let’s implement the class to receive the messages from the Topic, the TopicReceiver class, which contains a method that will read the messages from the Topic:
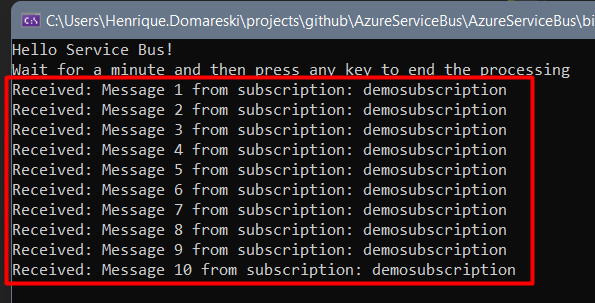
And back to Azure Portal, there will be 0 Active messages (Topic and Subscription pages):
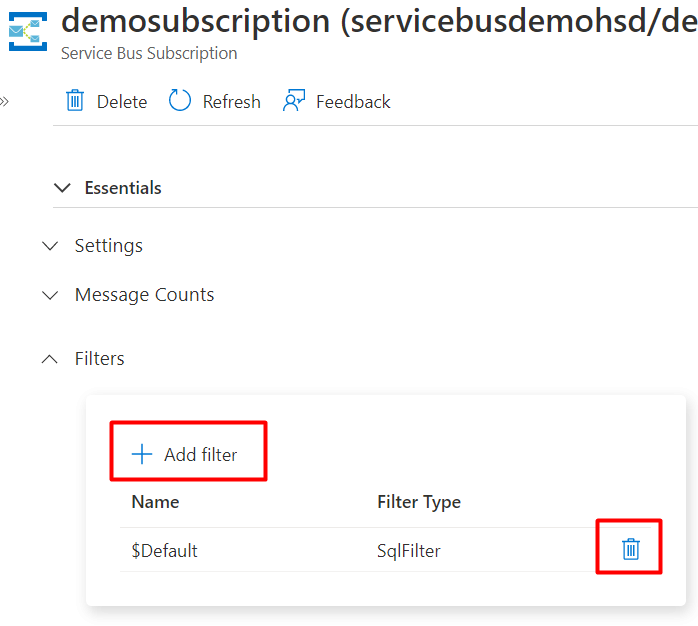
[Extra] On the Subscription page, you can define filters for the subscription, for that, delete the existent filter and click on the button to add a new filter and add the rules for your filter:
If you want to know more about filters, check Microsoft’s documentation page about “Set subscription filters (Azure Service Bus)”.
Monitor
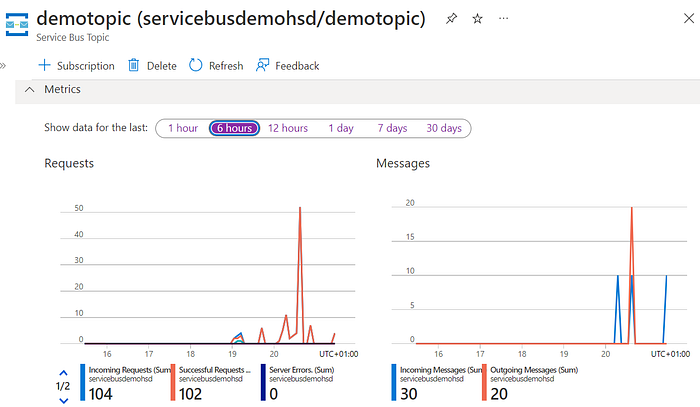
You can also make use of Monitoring features, available on the Azure Portal on the Service Bus page:
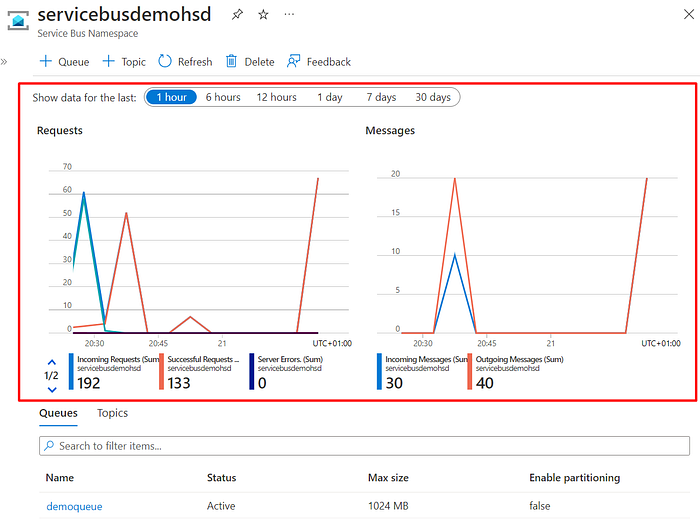
And can also check on the Queues and Topics pages:
Conclusion
Azure Service Bus is a robust and reliable message delivery system that can be used when you need to decouple services and applications by using message exchange with asynchronous communication. It allows you to make use of queues, for when you need to deliver messages to a single receiver, or topics, for when you need to deliver messages to multiple receivers, and offers a range of features such as message ordering, which ensures that the messages are processed in the order they were added to the queue or topic, dead-lettering, which helps you to identify and handle messages that could not be delivered, monitoring features, Expiration time (TTL), Filtering, and much more.
This is the link for the repository with the project in GitHub:
https://github.com/henriquesd/AzureServiceBusIf you like this solution, I kindly ask you to give a ⭐️ in the repository.
Thanks for reading!