Deploying a .NET 6 Web API and a SQL Database with Azure Pipelines
In this article, I explain how to deploy a .NET 6 Web API to an App Services in Azure Portal, by using Azure Pipelines. In this example, I’m using a repository in Azure DevOps environment.
For example purpose, I’m going to use the application “BookStore”, which I wrote about it in a previous article, about how to create an application from scratch using .NET (you can check the article here). This application is a .NET 6 Web API, EF Core, contains unit tests and uses an MSSQL database.
In order to deploy an application into Azure, we need an Azure account and an Azure subscription and we will also make use of some services in Azure. In a previous article, I explained how to create an Azure Subscription, a Resource Group, and an App Service. If you want to know more about it, please check the article on this link.
Creating a SQL Server
This project uses an MSSQL Server database, so for that, we must use create a “SQL Server” and a “Database”. In Azure portal, search for SQL Servers:

Then click on “Create” and create a new SQL Server selecting the resource group and adding the server name, user name and password:

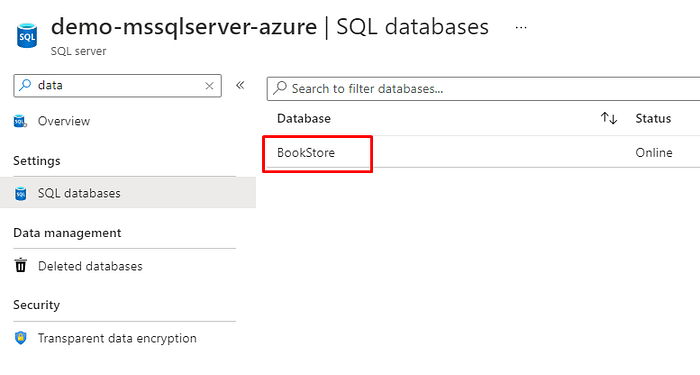
Now that we have the SQL Server in Azure, we can also create the Database. Go to “SQL Servers”, and click in “Create database”:

Informe the name of your database, select a “Compute + storage” and click in “Review + create”, review the info and click in Create:

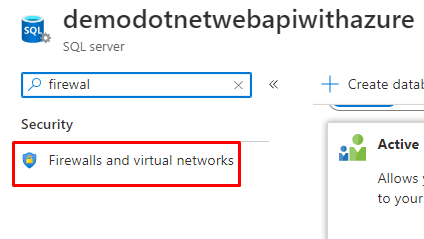
Configuring the firewall
In the SQL Server, go to firewall configurations:
Add your client IP or the IP’s that you want to allow to connect in the SQL Server:
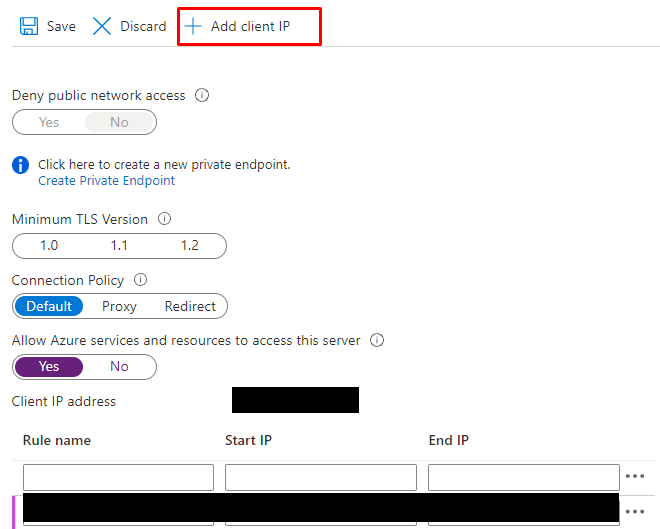
Also, make sure to select this option (you don’t want to forget to do it — believe me):

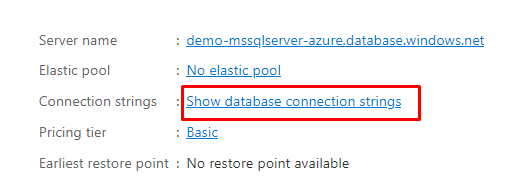
Now go to the database and get the connection string by clicking in the option “Show database connection strings”:
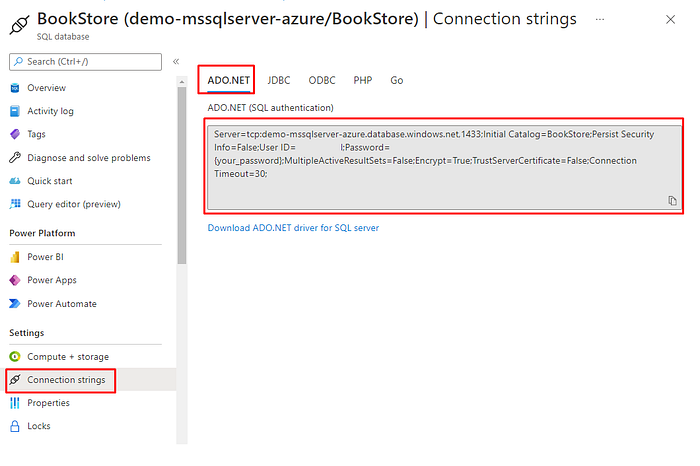
You will be redirected to the “Connection Strings” page. Copy the connection string that will be displayed in the “ADO.NET” option, and save it. We will need to add it to our API:
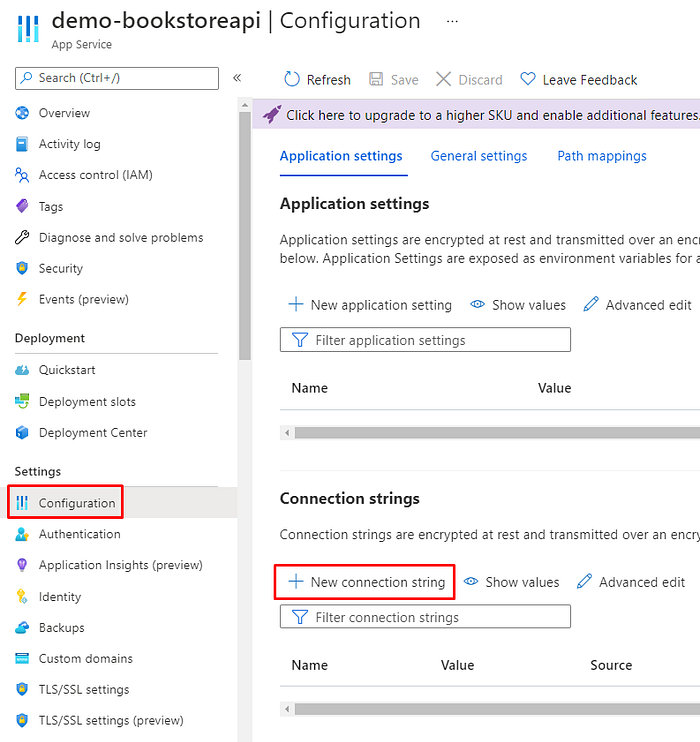
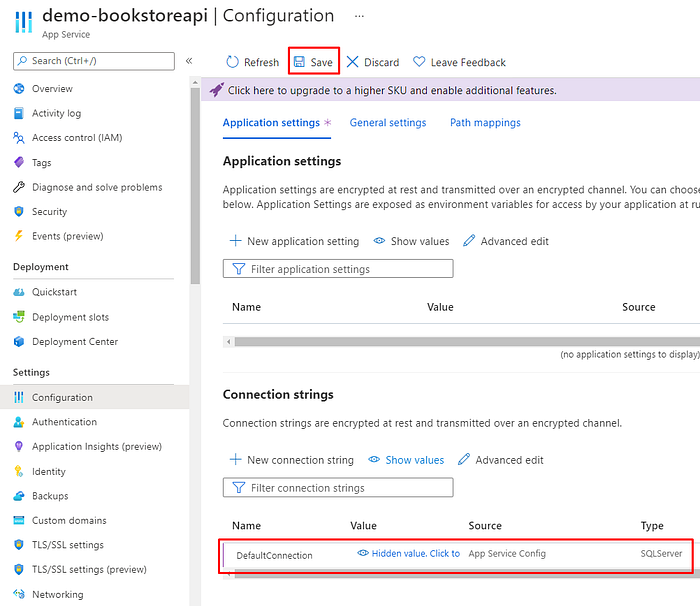
Then go to the App Service and search for the “Configuration” option and add a new connection string:
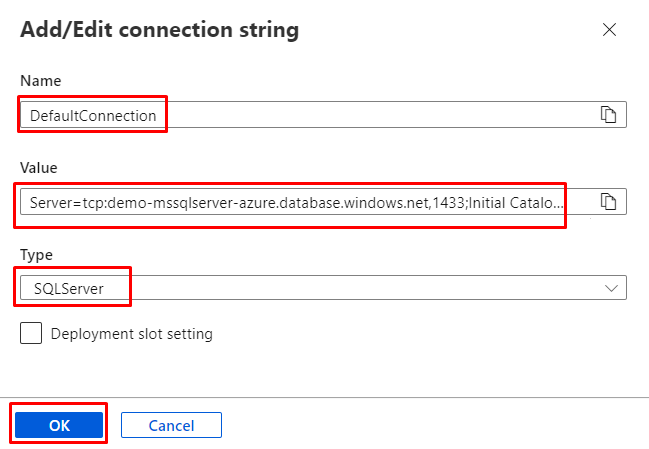
Add the configuration and click in “Ok”:
Now the connection string will be visible in the Configuration. Click in “Save”:
Creating the Pipeline
Implementing CI and CD pipelines helps to ensure consistent and quality code that’s readily available to users. And, Azure Pipelines provides a quick, easy, and safe way to automate building your projects and making them available to users. (Microsoft Docs)
The Pipeline is where the CI/CD process happens. “Continuous Integration (CI) is the practice used by development teams of automating merging and testing code.”, and “Continuous Delivery (CD) is a process by which code is built, tested, and deployed to one or more test and production environments.” (Microsoft).
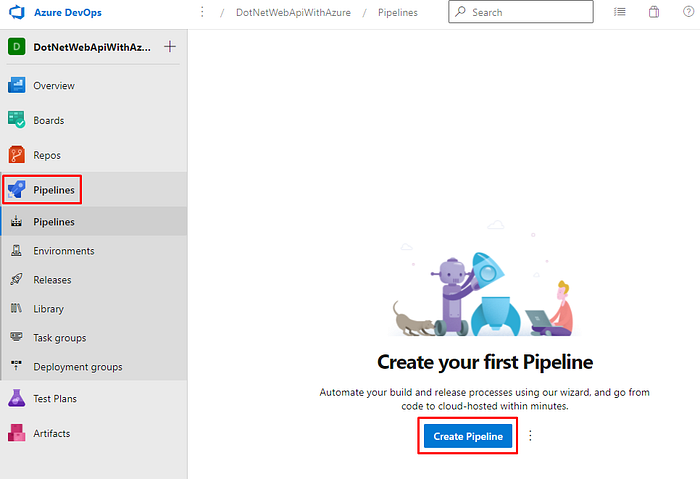
Considering that the Web API project is already in the repository in Azure DevOps, and we already created the environments, we can then create the pipeline. Go to “Pipelines” and click on “Create Pipeline”:
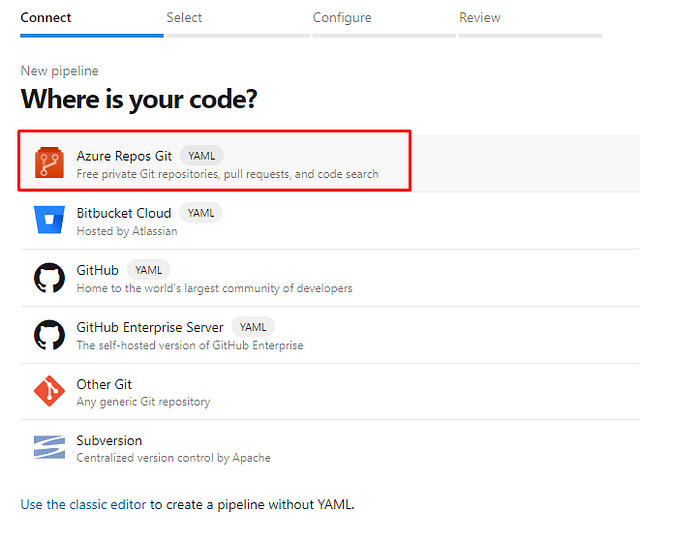
Select the “Azure Repos Git”:
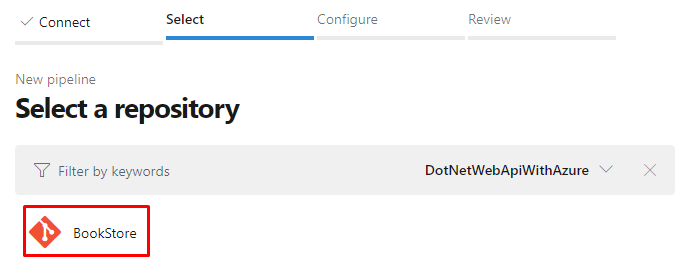
Select your project:
Select “ASP.NET Core”:

And then you should see the following page:
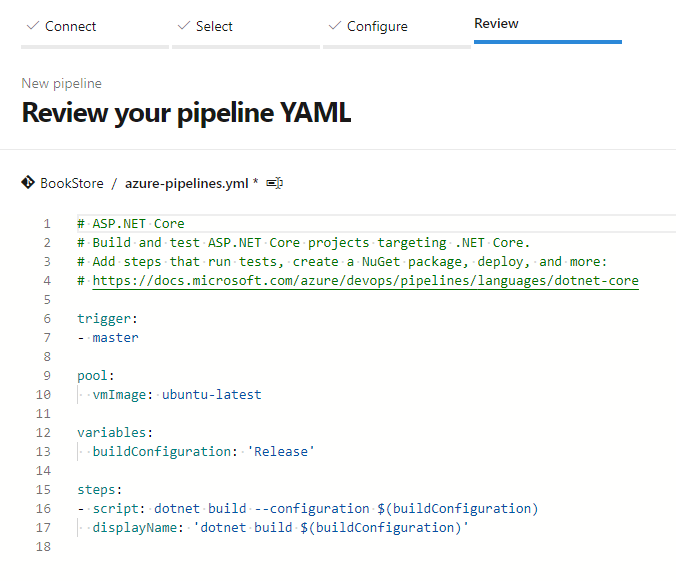
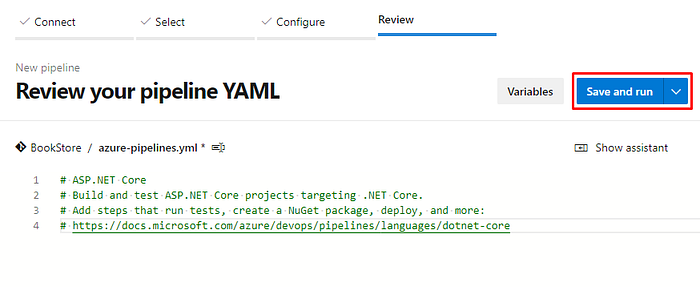
Now you can delete everything below the comments and we will create it from scratch. Remove it and click in “Save and run”:
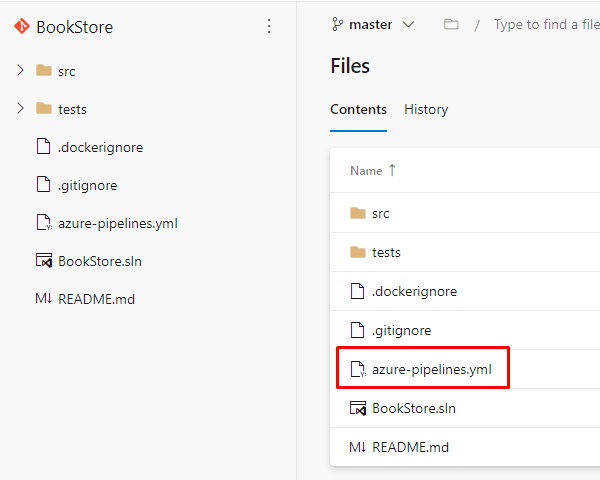
Now that we save it, we can see that a new file named “azure-pipelines.yml” will be added to our repository:
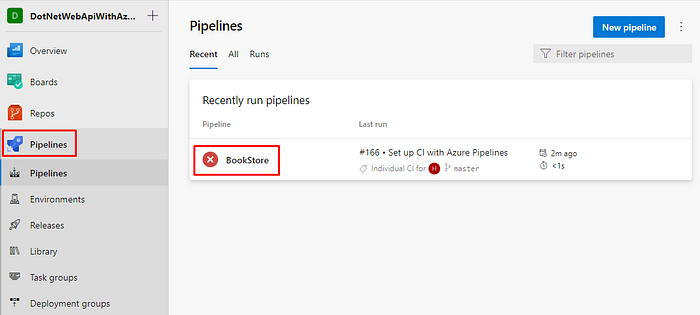
This is the file that we are going to use to configure the Pipeline. Now we can finally start to implement it. If you go to “Pipelines” you can see the pipeline for the project:
In a previous article, I explained how to create a Repository in Azure DevOps, and how to create Pipelines and Environments. If you want to know more about it, please check the article on this link.
Creating Services Connection (if necessary)
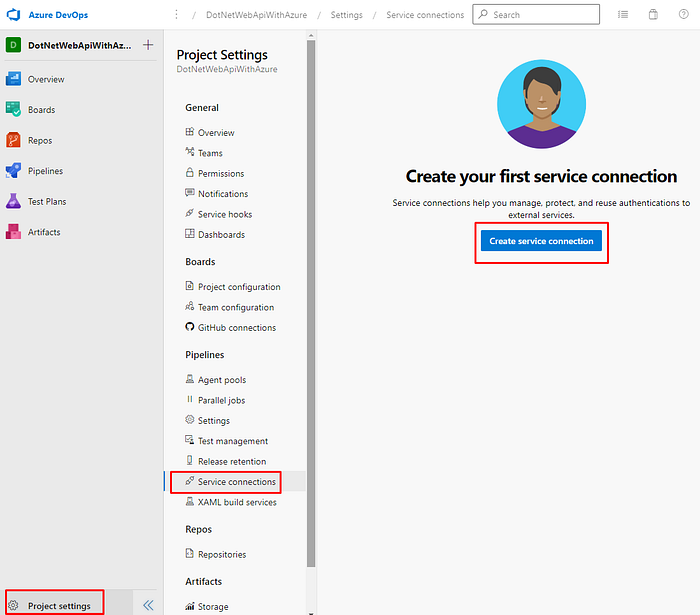
In case you already have a Service Connection configured, you can skip this topic. But in case you don’t have a Service Connection configured yet (if you have more than one account in Azure and did not use the main account to create the project for example, this can be the case), go to the Project Settings in Azure DevOps and click in “Service Connections”:
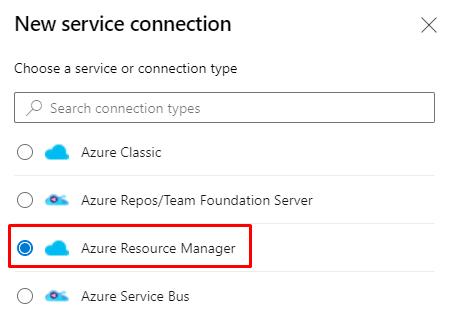
Select “Azure Resource Manager” and click in Next:
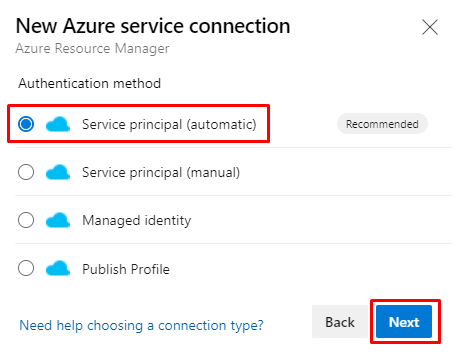
Select “Service principal”:
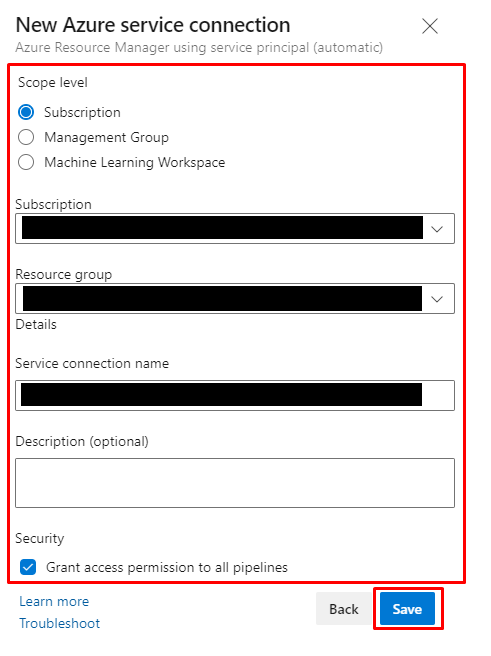
A new page will open for authentication. After that, select the “Subscription” option and inform the Subscription, Resource Group, Service connection name and check the checkbox in the Security and click in “Save”:
Creating Variables using Pipelines Library
A library is a collection of build and release assets for an Azure DevOps project. Assets defined in a library can be used in multiple build and release pipelines of the project. The Library tab can be accessed directly in Azure Pipelines. (Microsoft Docs)
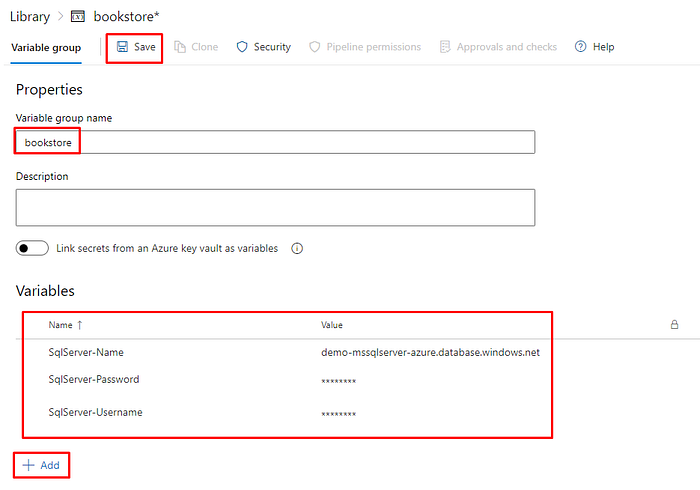
In Azure DevOps, it’s possible to make use of the Library to store a group of variables that we can use in the pipeline. In the Library we can configure variables that we want to use in our pipelines, and it’s also possible to add sensitive data and hide the value. In order to use the variables in the Library in Azure DevOps, go to Pipelines > Library > click in “+ Variable group”:

Add the variable group name, add the variables you want to use in the pipeline (you can also click in the lock icon to “lock” the value of sensitive data for example), and click in “Save”:
All assets defined in the Library share a common security model. You can control who can define new items in a library, and who can use an existing item. (Microsoft Docs)
Then in the pipeline you can set the variables group and make use of them by using the syntax $(variable-name):
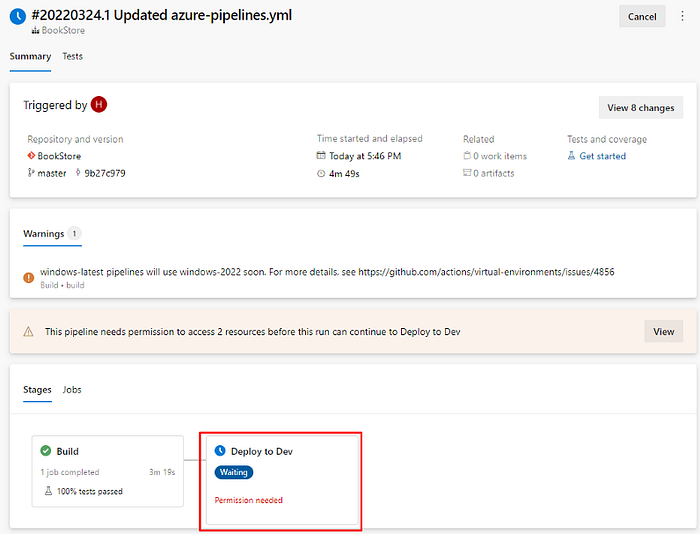
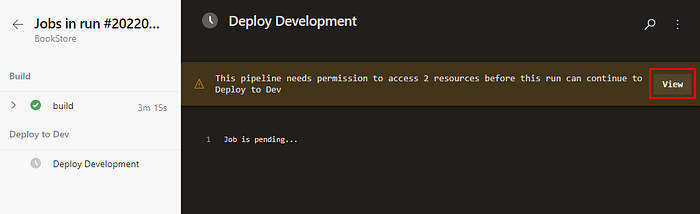
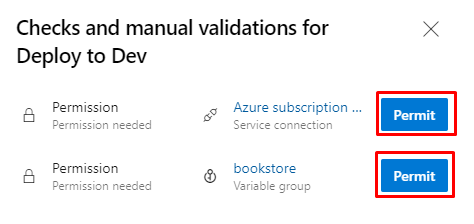
After creating the variables and running the pipeline for the first time, it’s necessary to give the permission:
Implementing the Pipeline
Now we can implement the YML file for the Pipeline. In the “azure-pipelines.yml” file we have the following main steps in this exact order:
- 1- The configuration to use .NET 6 will be added
- 2- The application will be build
- 3- The unit tests will run
- 4- The application will be zipped and published to the pipeline artifacts
- 5- The application will be deployed to an App Service
- 6- EF Core will be installed
- 7- The SQL Script will be created, based on the EF Core migrations we have in the project
- 8- The SQL Script will be added to the pipeline artifacts
- 9- The SQL Script will be executed in the database
To have an overview, you can see the complete yml file below. I will explain step by step:
In the first part, in the “trigger”, means that every time something changes in the “master” branch, it will run the pipeline. Next we are setting the configuration to be executed in a Windows environment. After that we are setting all the variables that we are going to use in the yml file:
In the build stage, we are setting the configuration to use .NET 6, and then we build the solution, and run the unit tests:
In the next stage, we are deploying to Development. The “dependsOn” and “condition” configuration means that this stage will only be executed if the Build stage it’s running without failure. And in the variables group, we are setting the configuration to make use of the “bookstore” variables group, which was created in the Pipeline Library. And we created a job to deploy to development, and we add a new variable named “SQLFile”, which is the path for the SQL Script that will be created and executed by the pipeline:
In the next step, we set the configuration to use .NET 6, and we publish the project to an artifact:
In the next task, in AzureWebApp task, we publish the app to an App Service:
Then we add a task to for the manifest, which is necessary in order to install local tools and after that, we install EF Core, and then we create the SQL Script (which will be generated based on the migrations of your project) to be executed and we publish it to a pipeline’s artifact:
And in the last task we execute the SQL Script in the database:
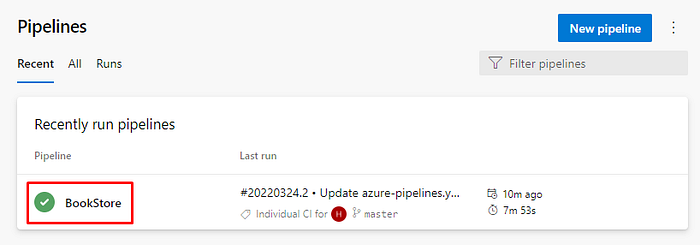
Now we can save and run the pipeline. If everything goes well, you should see the pipeline green:
Now the API will be available in the App Service (you can check the URL in the App Service in Azure Portal):
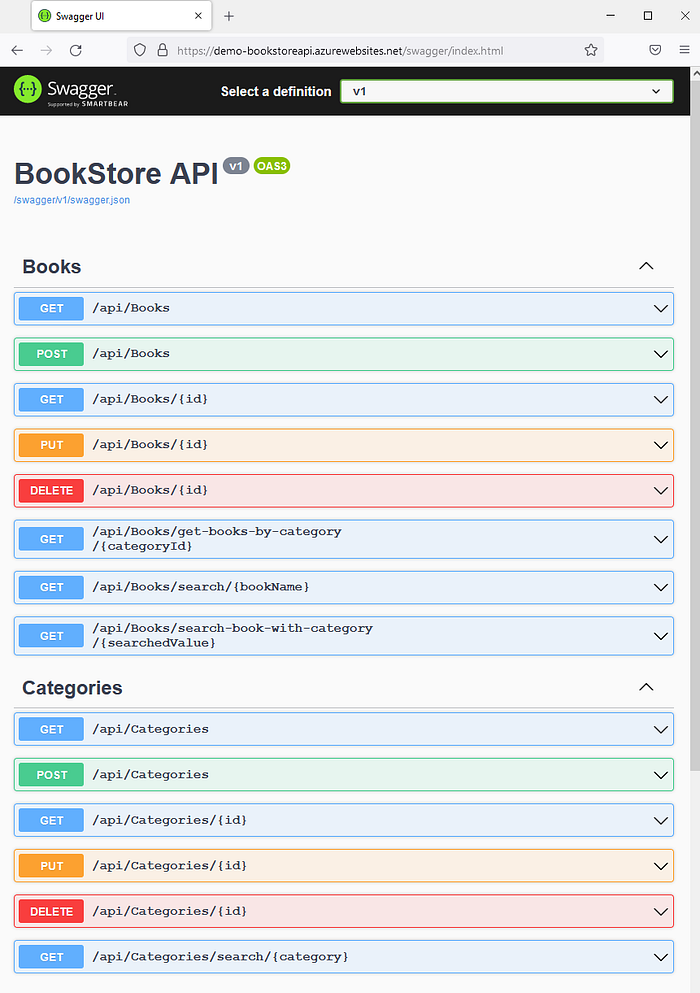
Let’s add one category for testing:

It was successfully added. Let’s execute a Get operation and see that the category will be returned:
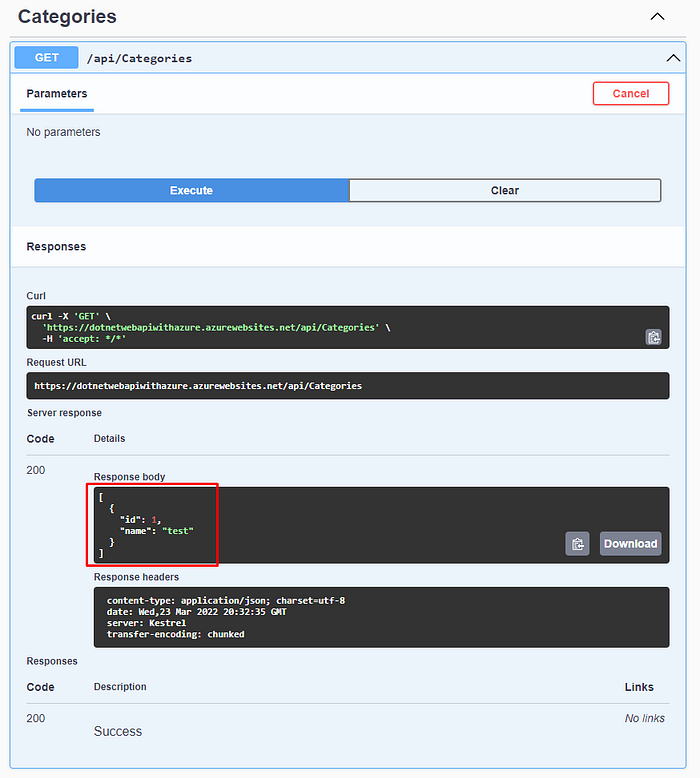
We can also check the data in the database by using MSSQL Server locally:
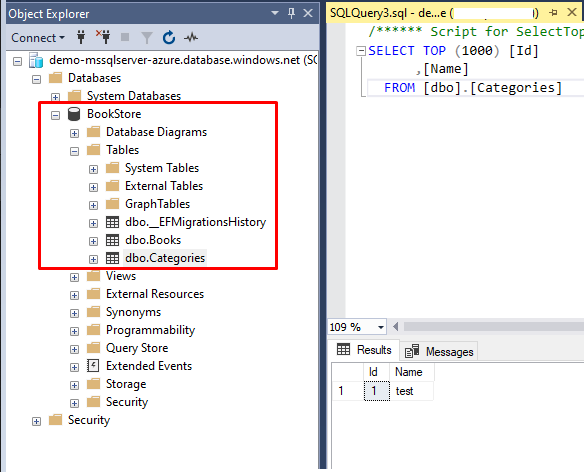
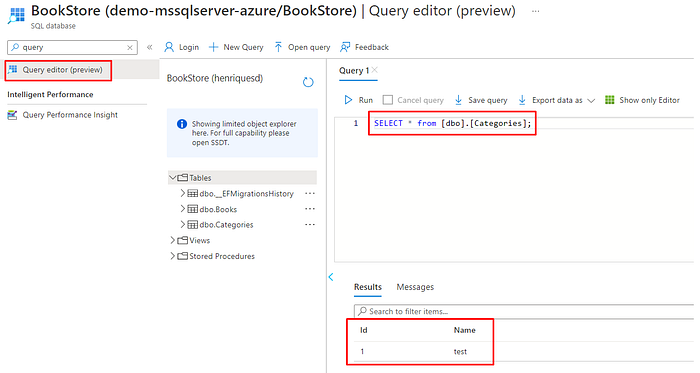
With an MSSQL database, it’s also possible to query data using Azure Portal (SQL Server > Database > Query):
Conclusion
Azure DevOps provides a great and integrated way to implement CI/CD to your projects. Even if your code is in other platforms such as GitHub, Bitbucket or others, you can still make use of Azure Pipelines. In this example, we saw how can we implement the pipeline using a repository in Azure DevOps and how to configure the pipeline to deploy a Web API using .NET 6 and an MSSQL database. You can check the code of this project here:
https://github.com/henriquesd/BookStoreAzurePipelinesIf you like this solution, I kindly ask you to give a ⭐️ in the repository.
Thanks for reading!